Wednesday, October 27, 2010
Overseeding Methods
Our yearly overseeding program has drastically decreased from what it was a couple of years ago. We used to put out over 20,000 pounds of seed and spend about $35,000 on the practice including the fertrilizer, growth regulators, and amendments to make it work. The last two years, we've stopped seeding the fairways and primary rough. The ryegrass we put out is limited to the tees, approaches, green surrounds, and a few lawns near the clubhouse. Besides that, we let the poa annua come in and provide a playing surface for the golfers. With a monthly application of iron sulfate, we keep the turf fairly green and most people can't tell the difference. The real appeal of this change in turf management is a financial savings of $30,000 plus a reduction in course down time. Rounds are up and so are outside tournaments. From an agronomic standpoint, I prefer to battle poa annua rather than ryegrass when we attempt to burn it out and promote our bermudagrass. It's been a win-win so far, and I think it's here to stay.
There are many different ways to get your ryegrass going and it can be as simple or as complicated as you like. My favorite is the simple broadcast method that takes no time and little effort while producing great results. The crew at Stockton Golf and Country Club taught me this simple technique of blasting out ryegrass through a fertilizer spreader and dragging it in with a metal fence. We open up the spreader all the way and spread seed from the green collar to the rough to spruce up the green surrounds. This is also a great method for your homelawn and is really as simple as spreading some seed and keeping enough moisture on it to germinate.

I took the above picture last weekend on #10 green surround. This area is primarily common bermuda and would be brown once the first frost shows up. Two weeks after broadcasting the seed, we have some thin, yellowish leaves emerging. After a shot of fertilizer and some more time, we will have dark green turf around all the greens.
For the tees, we used a walk-behind seeder called a Mataway. Marvin and Richard stopped going to the gym for a few weeks and got their excercise seeding the tees in three directions. This is a lot of work and a lot time, but the results are worth it.

The approaches endured a much more aggressive treatment with a tractor-mounted slit seeder going in 3 directions. This ripped out a tremendous amount of thatch and bermuda stolons. This work should firm up the approaches and improve the drainage. The seed will take a little while to fill in, so please be patient.

On all the tees and approaches we follow up the slit seeding with an additional broadcast seeding and a layer of sand. Once the sand is in place, we drag the area with a steel mat to work in the sand and smooth the surface. Finally we hit it with some fertilizer and water it all in. Irrigation is handled differently during germination. Normally we will water deep and infrequent. The seed requires the exact opposite so we will water multiple times for just a couple of minutes.

More updates to come in the near future. Other projects going on include flower beds and landscape work, manually cleaning duckweed out of the ponds, renovating the native area on #2, and getting ready to embark on the new tree program which will be fun. Stay tuned.

I took the above picture last weekend on #10 green surround. This area is primarily common bermuda and would be brown once the first frost shows up. Two weeks after broadcasting the seed, we have some thin, yellowish leaves emerging. After a shot of fertilizer and some more time, we will have dark green turf around all the greens.
For the tees, we used a walk-behind seeder called a Mataway. Marvin and Richard stopped going to the gym for a few weeks and got their excercise seeding the tees in three directions. This is a lot of work and a lot time, but the results are worth it.

The approaches endured a much more aggressive treatment with a tractor-mounted slit seeder going in 3 directions. This ripped out a tremendous amount of thatch and bermuda stolons. This work should firm up the approaches and improve the drainage. The seed will take a little while to fill in, so please be patient.
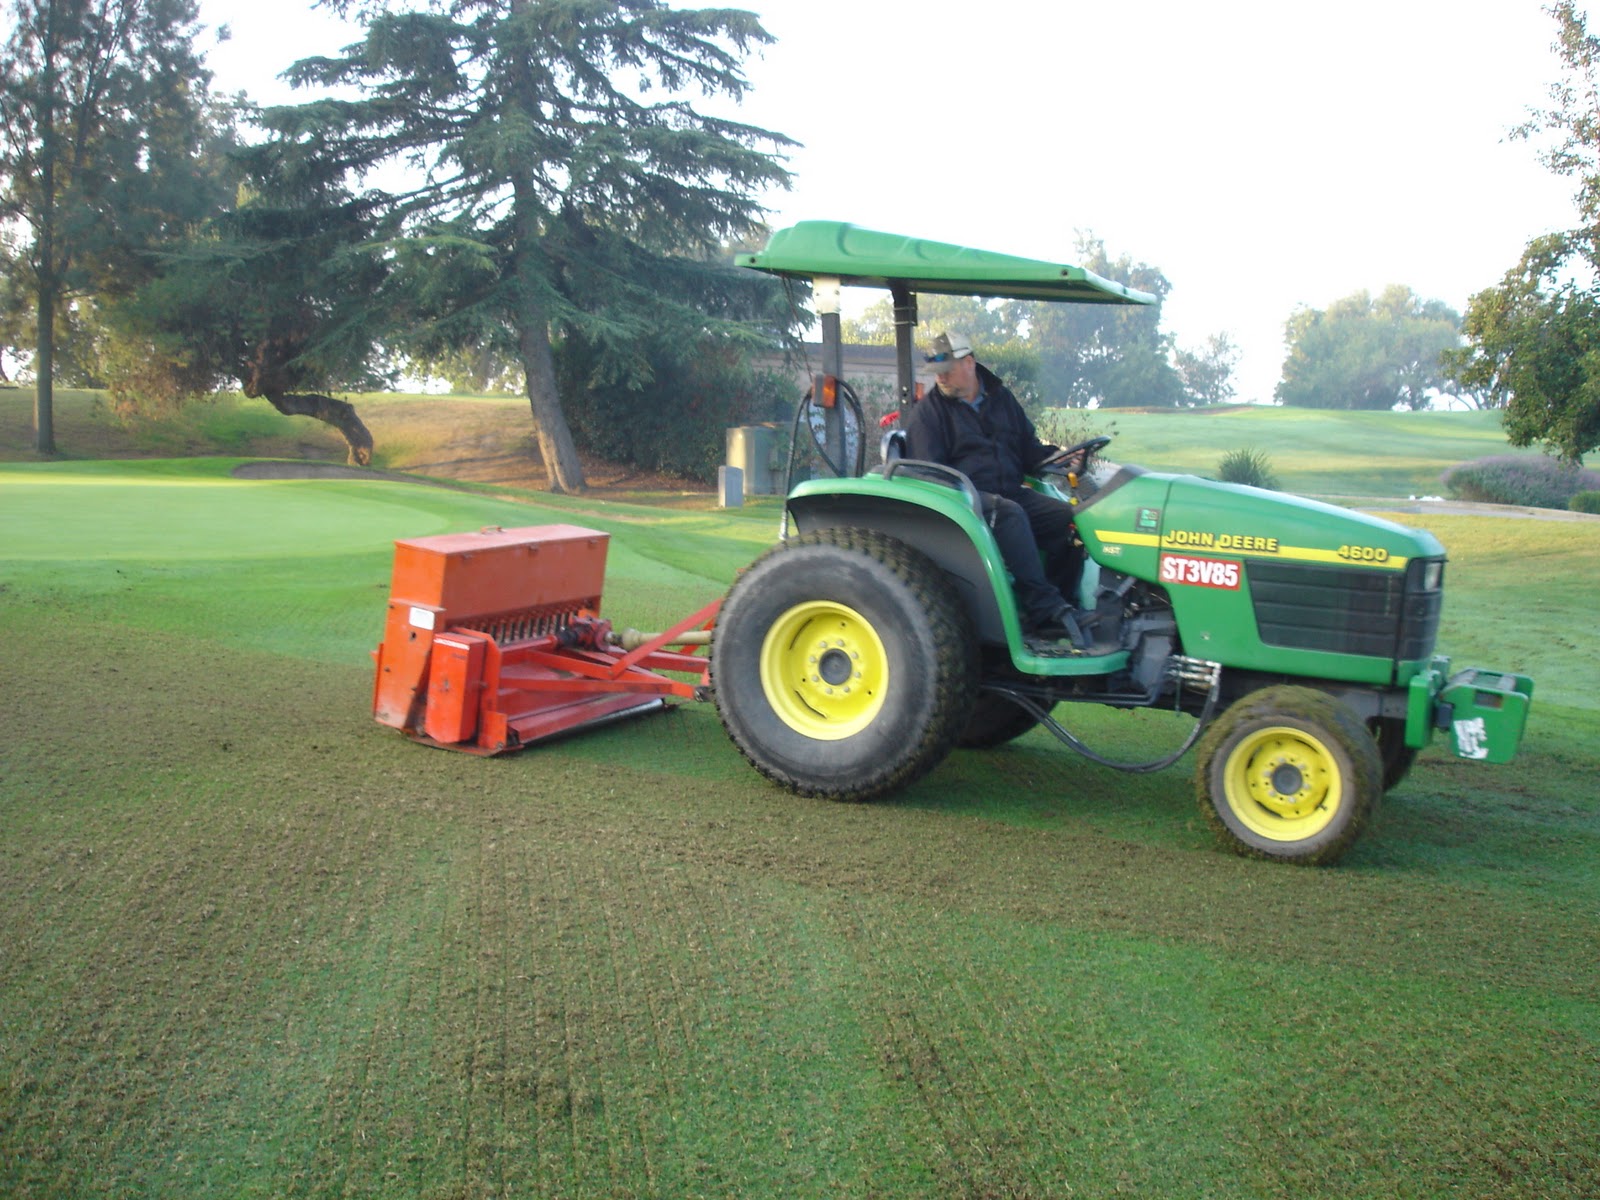 |
| Assistant Superintendent, Rob Williams seeding on #7 approach. |
 |
| Here is the result on a bermuda approach. |
 |
| Geronimo, Mario, and Ricardo cleaning up the mess and chasing after Rob. |

On all the tees and approaches we follow up the slit seeding with an additional broadcast seeding and a layer of sand. Once the sand is in place, we drag the area with a steel mat to work in the sand and smooth the surface. Finally we hit it with some fertilizer and water it all in. Irrigation is handled differently during germination. Normally we will water deep and infrequent. The seed requires the exact opposite so we will water multiple times for just a couple of minutes.

 |
| Here is #13 approach after it is all said and done. 2 weeks from now should look better. |
Subscribe to:
Post Comments (Atom)


0 comments:
Post a Comment